Prevent changing of Sound Scheme in Windows 11/10
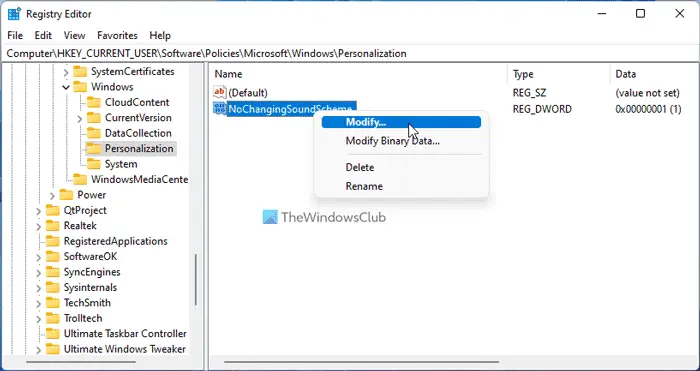
To prevent changing the Sound Scheme in Windows 11/10, follow these steps: To learn more about these steps, continue reading. Open regedit and navigate to the following key:
Right-click Windows in the left pane and create a new key and name it as Personalization. Now select Personalization & in the right pane create a new DWord NoChangingSoundScheme & give it a value ‘1‘. To enable it back, simply give it a value ‘0’ or delete the NoChangingSoundScheme DWord! Alternatively, type gpedit.msc in start search and hit Enter to open the Group Policy Editor.
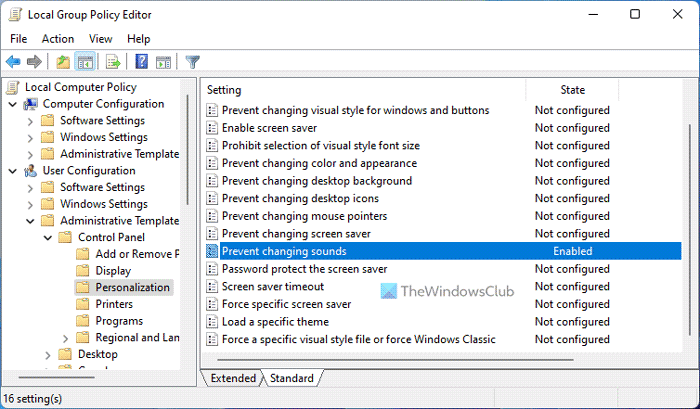
Navigate to User Configuration > Administrative Templates > Control Panel > Personalization. Now double click Prevent changing sounds in the right pane. This will open a new window. Here, select Enabled. Click Apply/OK > Exit. This setting prevents users from changing the sound scheme. By default, users can use the Sounds tab in the Sound Control Panel to add, remove, or change the system Sound Scheme. If you enable this setting, none of the Sound Scheme settings can be changed by the user.
How do I stop Windows from changing Sound settings?
To stop Windows from changing the Sound settings in Windows 11 or Windows 10, you can follow the above-mentioned guides. It is possible to prevent users from tweaking any Sound settings with the help of the Local Group Policy Editor and the Registry Editor. In the GPEDIT, you need to open the Prevent changing sounds setting and choose the Enabled option.
Why does Windows keep changing my Sound settings?
Windows may change the Sound setting according to the hardware installed on your computer. If you unplug or plug in new hardware, Windows 11 and Windows 10 may change the Sound setting according to that. However, you can prevent users and Windows from doing that by following these guides. As you can see, you can set several restrictions pertaining to Personalization here.


