When it comes to the best cloud storage service, three names come forward – Google Drive, OneDrive, and Dropbox. Although OneDrive comes as an in-built app in Windows 10, you need to install the other two cloud storage apps manually. You will be using the Registry Editor. Therefore, it is better to backup Registry files or create a System Restore point to be on the safe side.
How to add Google Drive to the context menu
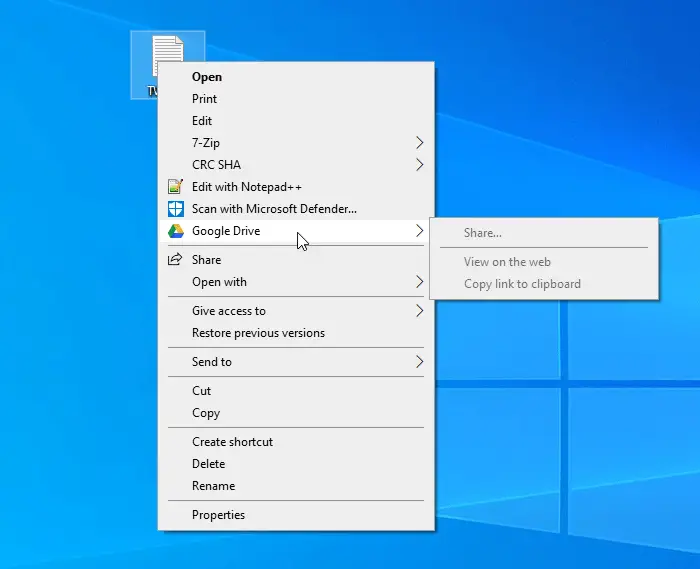
To add Google Drive to the context menu in Windows 10, follow these steps- To know more about these steps, you should keep reading. At first, you need to open Notepad on your computer. For that, you can search for “notepad” in the Taskbar search box and click on the result. Now, paste the following texts in the Notepad window. After that, click on File > Save As. Following that, you should select a location where you want to save the file. Then, enter a name with .reg file extension (e.g. testing.reg), select All Files from the Save as type drop-down list, and click the Save button. Now, you need to double-click on the newly created .reg file and click on the confirmation button. After that, you should find a “Google Drive” entry when you right-click on a file. It allows users to visit the Google Drive site, open the Preferences window, and start or stop synchronization.
Remove Google Drive from the context menu
If you want to remove Google Drive from the context menu, you need to delete some Registry files. To do that, open the Registry Editor on your computer, and delete GDContextMenu after navigating to the following paths one after one- Now you should not find Google Drive in the right-click context menu. Read: How to add Google Drive to File Explorer Navigation Pane.
How to add Dropbox to the context menu
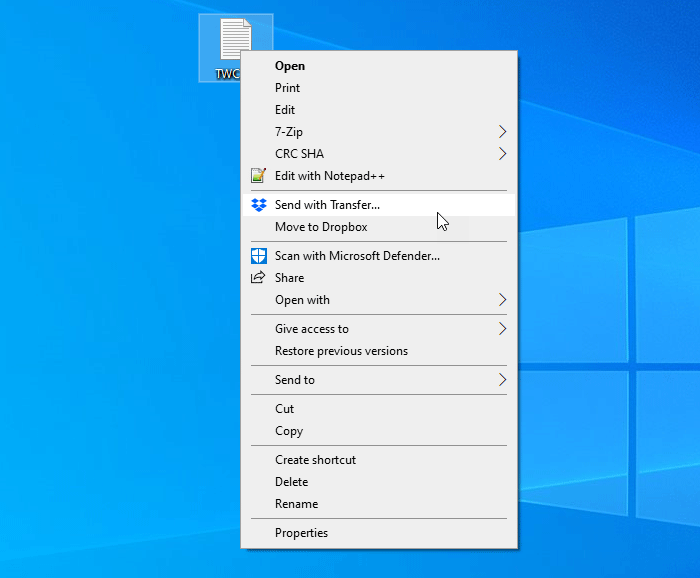
To add Dropbox to the context menu, follow these steps- Let’s check out these steps in detail. The process of adding Google Drive and Dropbox to the context menu is almost the same. However, you need to have a different set of Registry values. For that, open the Notepad on your computer and paste the following texts Click on File > Save As, select a location where you want to keep the file, enter a name with .reg file extension, select All Files from Save as type drop-down list, and click the Save button. After that, double-click on the .reg file and click on the Yes button to confirm the inclusion. Now, you should see a set of Dropbox-related options in the right-click context menu.
Based on the file or folder you selected, it might show a different set of options. For example, you can get Share, Send with Transfer, Copy Dropbox link, etc. Read: How to remove Dropbox from File Explorer Navigation Pane
Remove Dropbox from the context menu
To remove Dropbox entries from the context menu, you need to open Registry Editor on your computer, and delete DropboxExt from these following locations- After closing the Registry Editor, you will not see any Dropbox entry in the context menu. Read: How to remove OneDrive icon from Windows 10 File Explorer.
Remove Move to OneDrive from the context menu
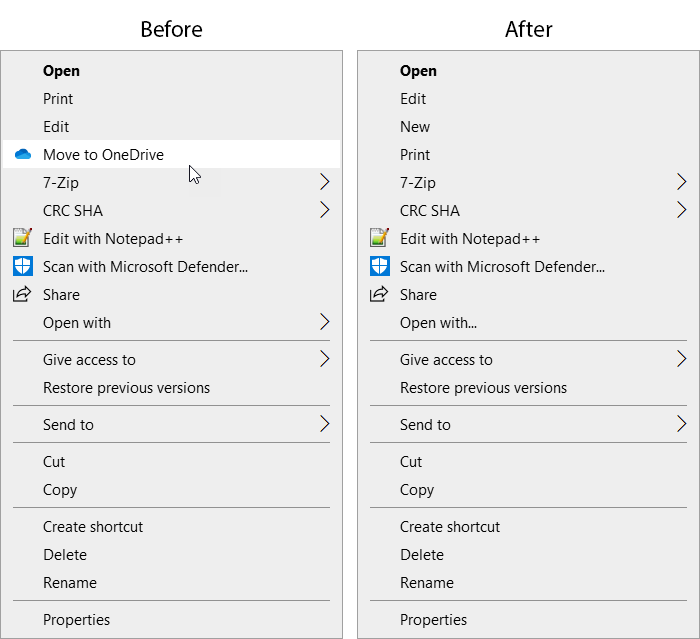
When your install OneDrive, it automatically adds an entry. To remove Move to OneDrive from the context menu, follow these steps- Read on to know more about these steps. At first, you need to press Win+R, type regedit, and hit the Enter button. Following that, you can find a UAC prompt. If you click the Yes button, you will find Registry Editor on your screen. After that, you need to navigate to the following path- Now, right-click on the Shell Extensions, select New > Key and name it as Blocked.
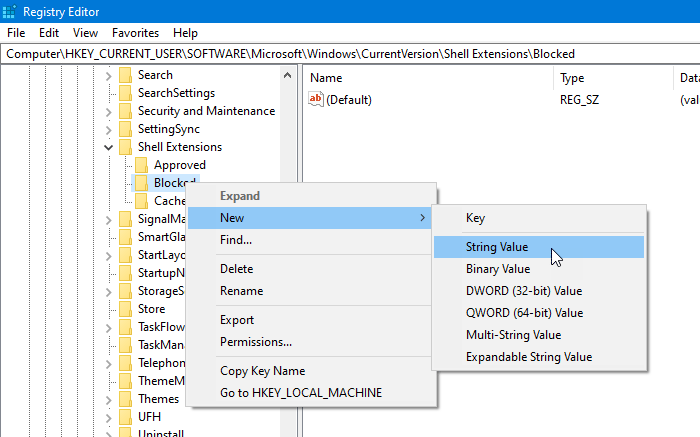
After that, right-click on Blocked, select New > String Value, and name it as {CB3D0F55-BC2C-4C1A-85ED-23ED75B5106B}.
Now you can close the Registry Editor, and you should not find the “Move to OneDrive” option in the right-click context menu. Hope this helps!


